You’ll enable Moodle Web Services + REST, create an External Service and a dedicated integration user, generate a token, then paste the Moodle URL + token into Enrollait.
Key takeaways
- Use a dedicated integration user (don’t use your personal admin).
- REST must be enabled, otherwise the token won’t work.
- Enrollait can enroll students even if a Moodle course is hidden. Students will see the course only after it’s set to Visible/Public.
- If something fails, start by re-checking Web Services + REST, then permissions.
Requirements
Before connecting Moodle, make sure you have:
- Admin access to your Moodle site.
- A Moodle URL (example: https://school.edu/moodle).
- Permission to create Web Services tokens and manage External Services.
Moodle connection setup
Follow these steps in order. Most setups take ~10 minutes.
Enable Web Services
- Log in to Moodle as an Admin.
- Go to: Site administration → General → Advanced features.
- Turn ON “Enable web services”.
- Click “Save changes”.
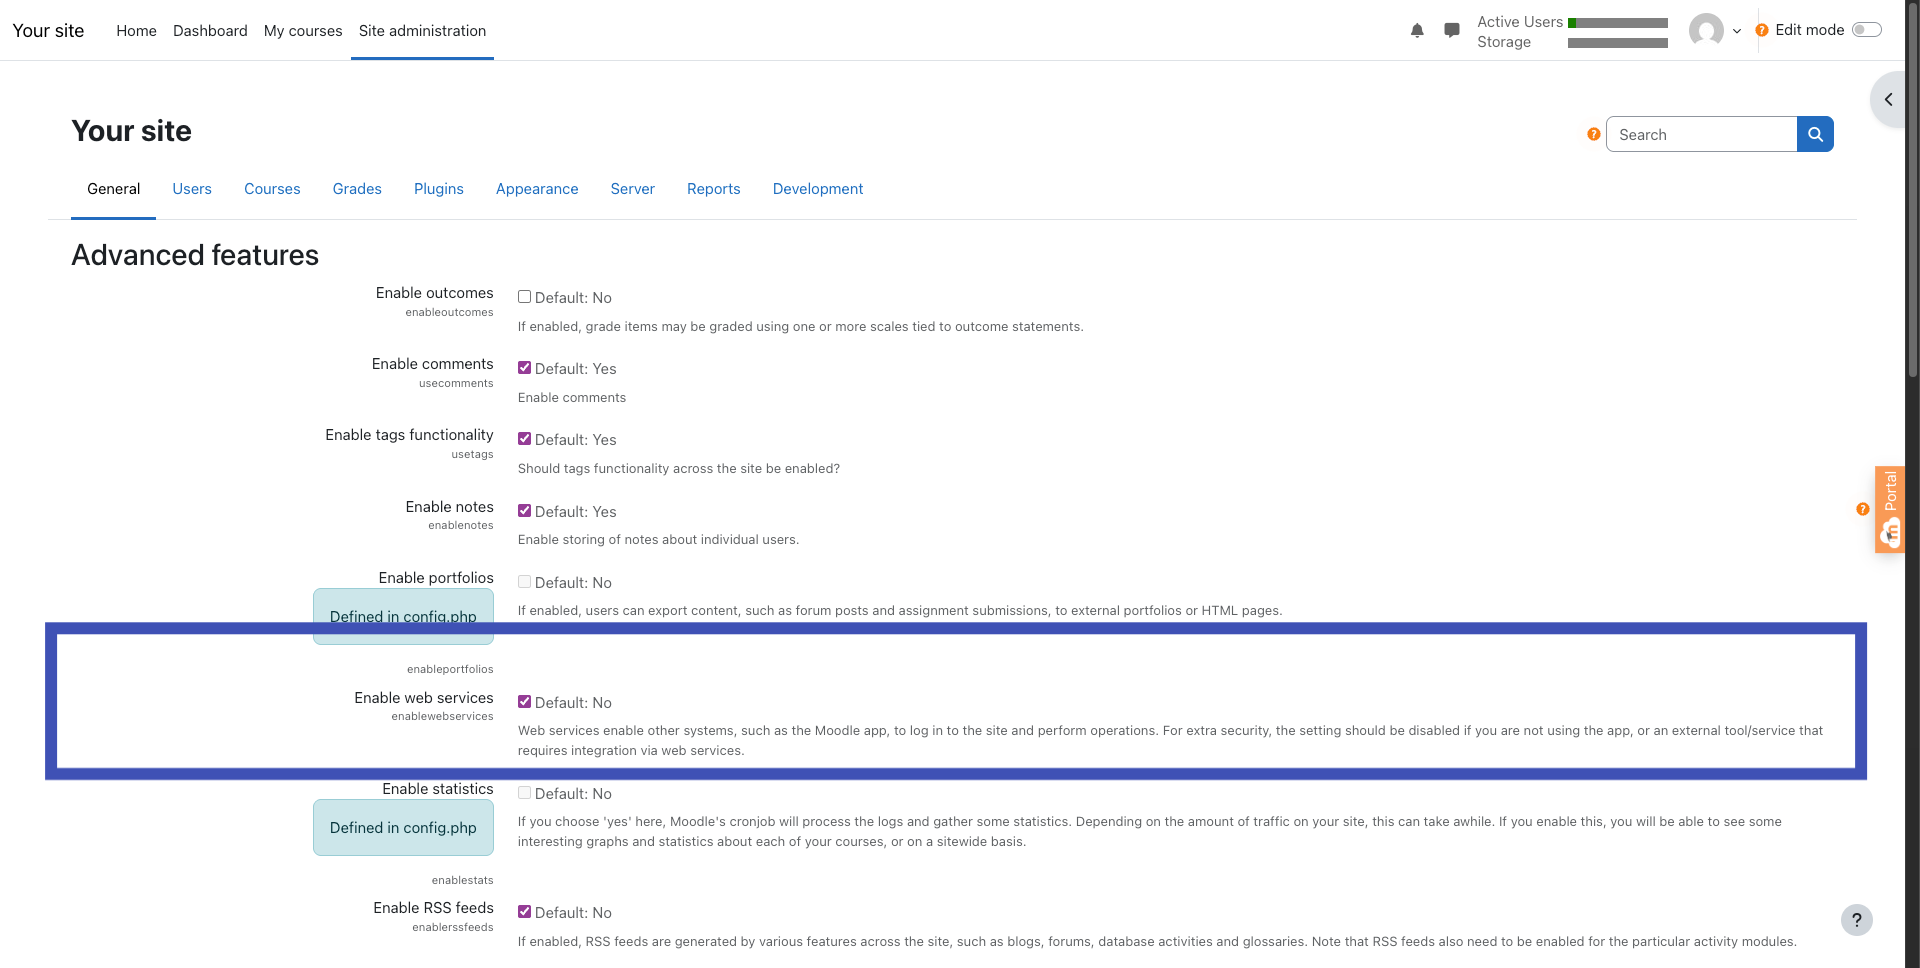
If you don’t see Web Services options later, return here and confirm this setting is still enabled.
Enable the REST protocol
- Go to: Site administration → Server → Web services → Manage protocols.
- Make sure “REST protocol” is Enabled.
- Save changes (if required).
Create a dedicated integration user
You can use an admin user, but it’s best to create a dedicated integration user so you can rotate credentials safely.
- Go to: Site administration → Users → Accounts → Add a new user.
- Create a user.
- Click “Create user”.
Username: enrollait-user
Email: support@enrollait.com
Password: (set a strong password)Before continuing, go back to Advanced features and confirm “Enable web services” is still ON.
Create an External Service for Enrollait
- Go to: Site administration → Server → Web services → External services.
- Click “Add”.
- Name: Enrollait Service
- Short name: enrollait
- Enabled: On
- Authorised users only: On
- Click “Add service”.
Add the required functions
Open your External Service (Enrollait Service) → Functions → Add functions, then add the functions below.
core_webservice_get_site_info
core_course_get_courses
core_course_get_categories
core_user_get_users
core_user_create_users
core_enrol_get_course_enrolment_methods
enrol_manual_enrol_usersIf a function doesn’t show up, Web Services or REST is usually disabled — re-check Step 1 and Step 2.
Grant the right permissions
Most connection failures happen here. The simplest setup is to make the integration user a Site Administrator.
- Go to: Site administration → Users → Permissions → Site administrators.
- Click on enrollait-user. (Enrollait User)
- Click on Add
If your organization can’t grant Site Administrator, you’ll need to manually grant the capabilities required by the functions you enabled.
Create a Web Services token
- Go to: Site administration → Server → Web services → Manage tokens.
- Click “Create Token”.
- Name: Enrollait Token
- User: enrollait-user (Enrollait User)
- Service: Enrollait Service
- Disable expiration date.
- Click “Save changes”.
Moodle will generate a token (example: 3b8f2c…). Copy it immediately and store it safely.
Connect Moodle inside Enrollait
- In Enrollait Admin, go to: Admin → Integrations → Moodle.
- Paste: Moodle URL + Moodle Token.
- Paste Moodle URL in Moodle Site URL
- Paste Moodle Token in Web Service Token
- Click “Test connection”, if it works then “Save”.
- Continue to “Sync Courses & Categories”.
    Moodle URL: https://your-moodle.com
    Moodle Token: 3b8f2c…
Sync courses and categories
Click “Sync courses & categories” to pull your Moodle categories and courses into Enrollait.
Sync can be run again any time if you add new courses or change category structure.
Enrollait can enroll students even if the course is hidden in Moodle. Students will only see the course in their Moodle dashboard once the course is set to Visible/Public.
Troubleshooting
- Confirm enrollait-user is a Site administrator (Step 7).
- Confirm your External Service includes the required functions (Step 5).
- Re-check: Manage protocols → REST protocol enabled (Step 2).
- Recreate the token and confirm it was created for:
- User: enrollait-user
- Service: Enrollait Service