You’ll add Stripe API keys inside Enrollait, create a webhook destination in Stripe, then paste the signing secret back into Enrollait.
Key takeaways
- Use Stripe Test Mode first, then switch to Live Mode when ready.
- Keep your Secret key private — treat it like a password.
- Webhooks are required so Enrollait can confirm checkout outcomes reliably.
Never share your Stripe Secret key in chat, docs, or screenshots. Store it only in trusted admin settings.
Requirements
Before integrating Stripe, make sure you have:
- A Stripe account with access to Developers → API keys
- Your Enrollait Admin access (to paste keys + webhook secret)
- Recommended: start in Stripe Test Mode
In Stripe Test Mode, you can use: 4242 4242 4242 4242 with any future expiry date and any 3-digit CVC.
Stripe payment setup
Follow the steps below in order. Most setups take about 10 minutes.
Get your Stripe API keys
Open your Stripe API keys page and copy both keys.
Then paste them into Enrollait Admin → Integrations → Stripe.
- Publishable key → paste into Enrollait (Publishable Key).
- Secret key → paste into Enrollait (Secret Key).
Tip: Start with Stripe Test Mode so you can validate everything safely.
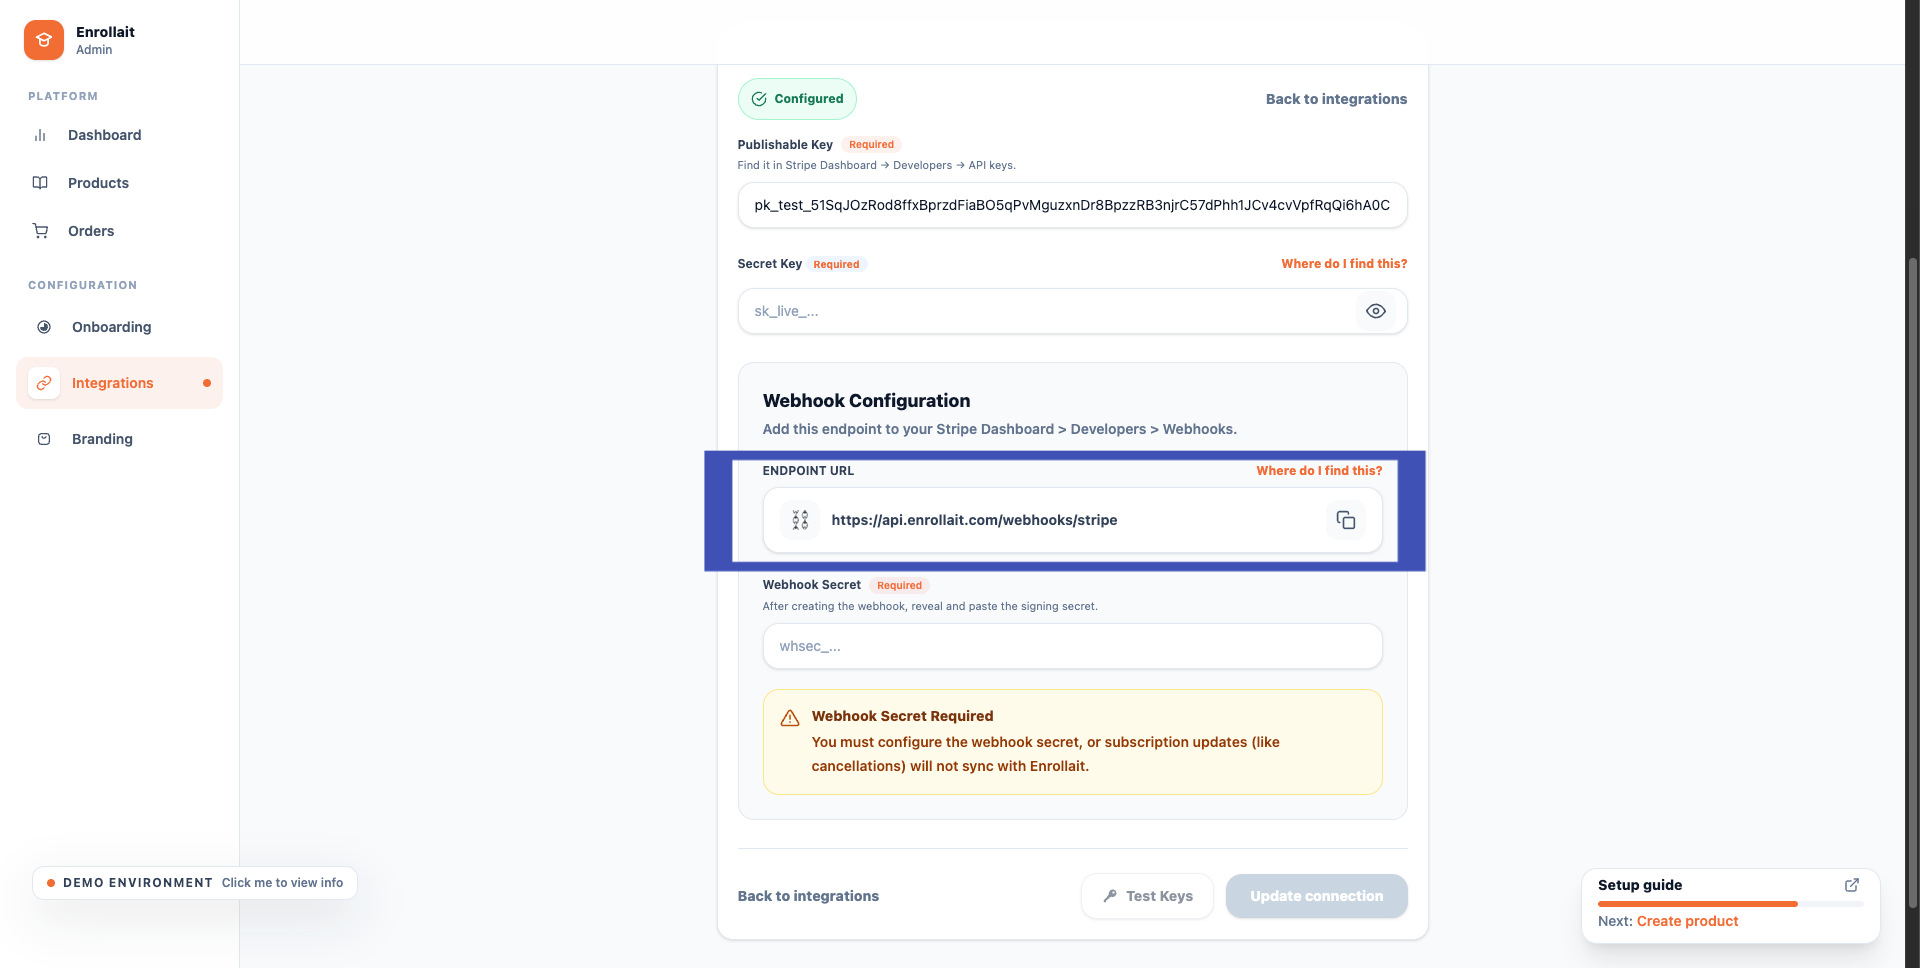
Copy the webhook endpoint from Enrollait
In Enrollait Admin → Integrations → Stripe
Find “Webhook Configuration → Endpoint URL
Copy the Endpoint URL — you’ll paste it into Stripe next.
Create a webhook destination in Stripe
Open Stripe Webhooks and create a new destination
- Click Add destination
Select webhook events
Enrollait needs these checkout events:
- Search for checkout.session.completed and click Add event.
- Search for checkout.session.expired and click Add event.
- Click on continue
checkout.session.completed
checkout.session.expiredSelect where to send the events
In Stripe, set the destination details:
- Select 'Webhook endpoint' as the Destination Type
- Click on continue
Add the endpoint URL and destination name
In Stripe, set the destination details:
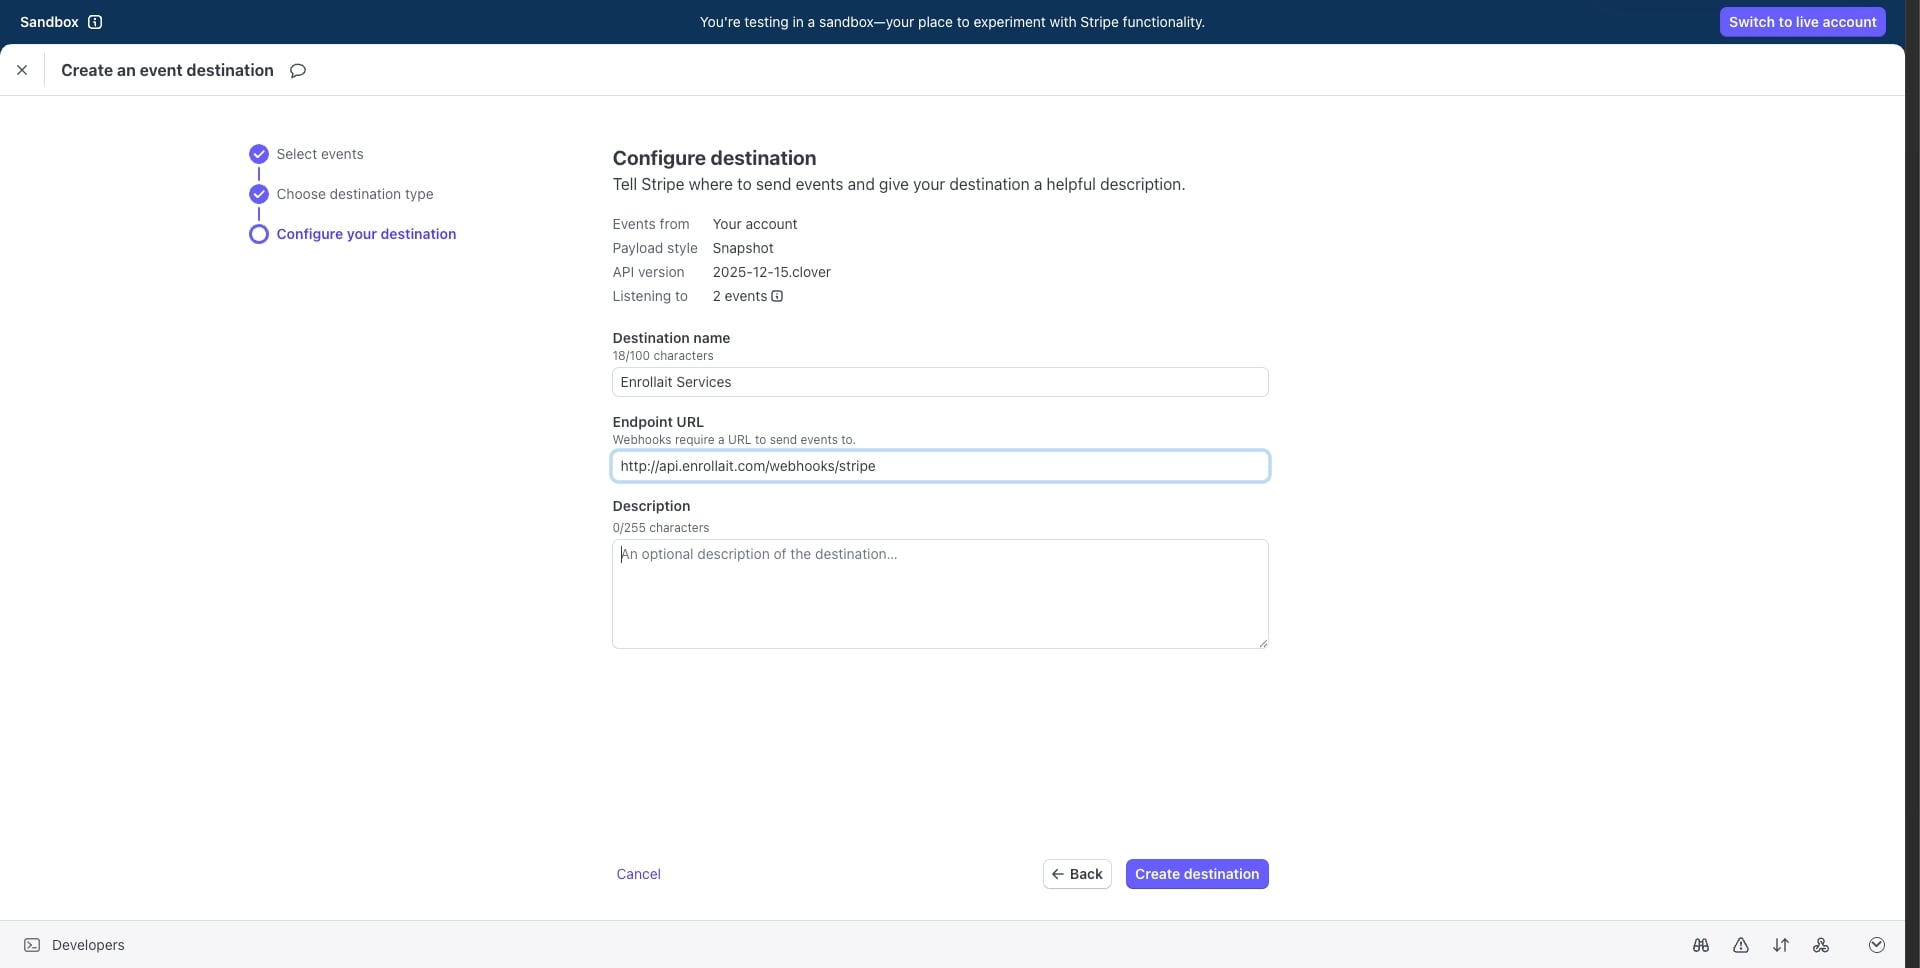
- Endpoint URL: paste the Webhook Configuration Endpoint URL you copied from Enrollait (Step 2) in ENDPOINT URL field.
- Name: Enrollait Services
- Description: optional (can be blank).
Then click “Create Destination”.
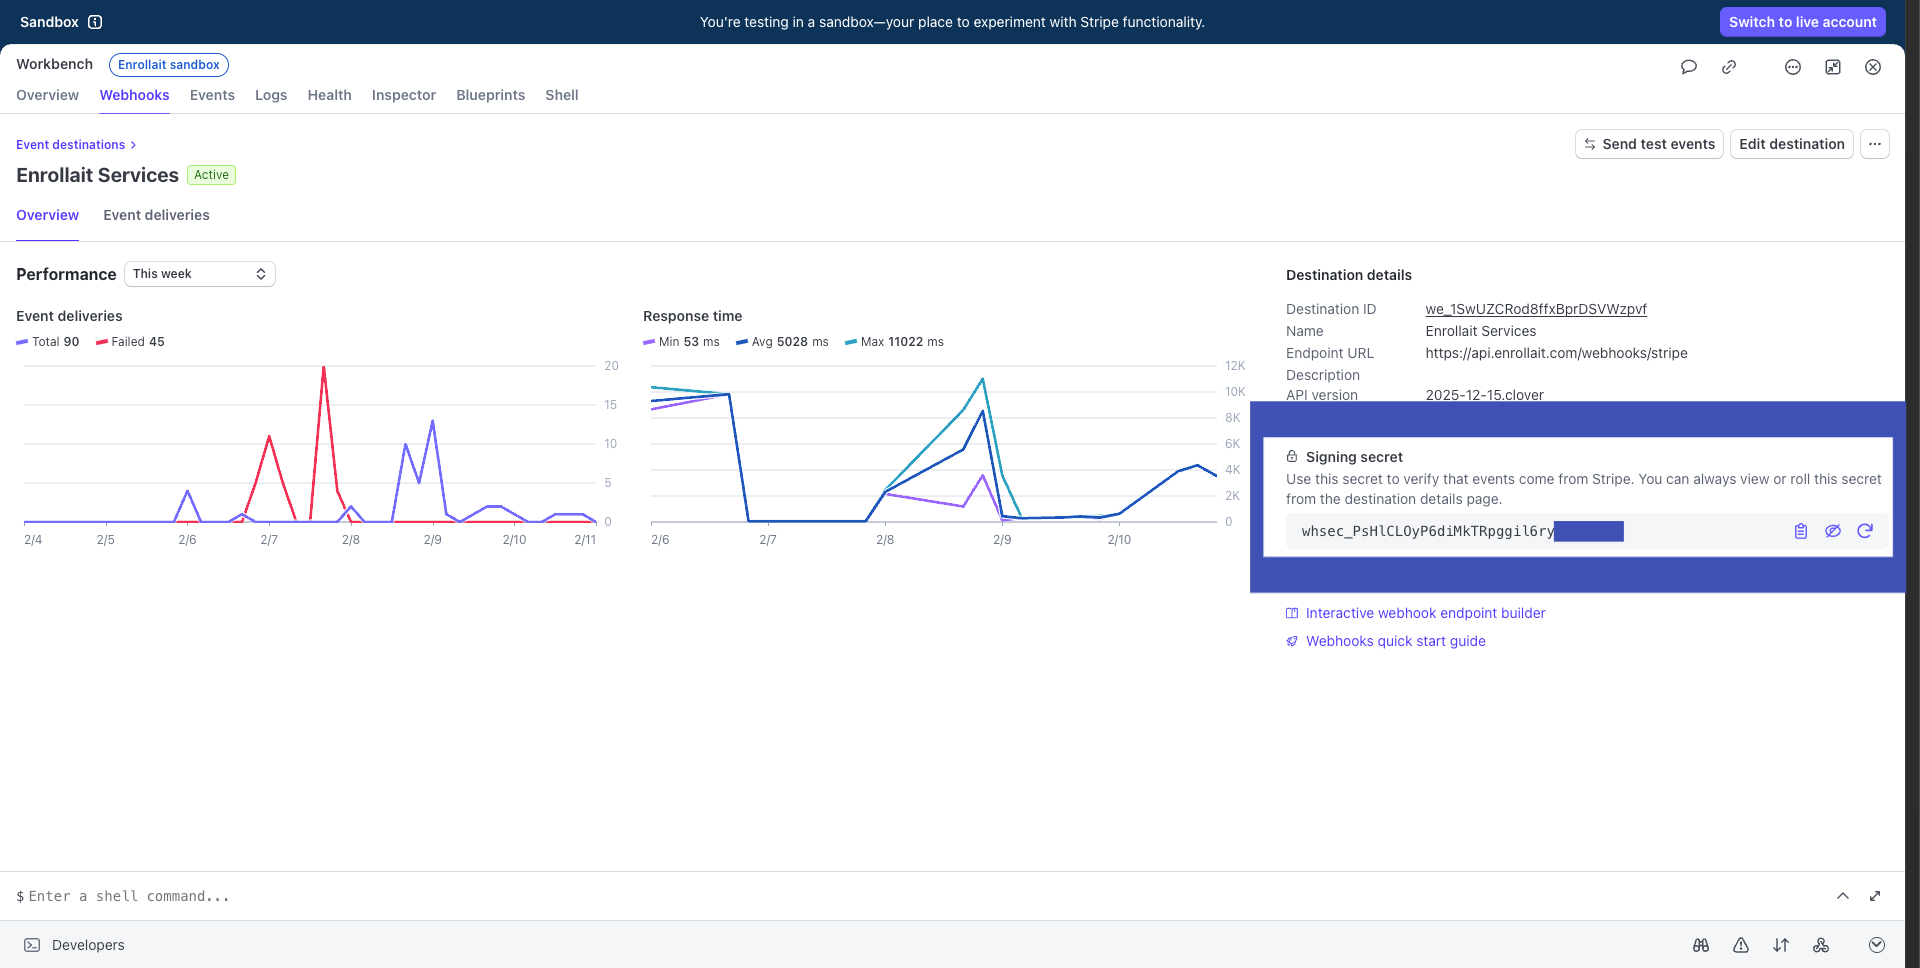
Copy the signing secret
Open the destination you just created in Stripe.
Find “Signing secret” → click “Reveal” → copy it.
Validate in Enrollait
Back in Enrollait Admin:
- Paste the Signing secret into “Webhook Secret”.
- Click “Test Keys”.
- If valid, Enrollait will show your Stripe Account ID and country.
- Click “Save and Continue”.
Stripe is now connected — you can process payments and Enrollait will receive checkout webhook events.
Testing & troubleshooting
- • Confirm you used keys from the correct mode (Test vs Live).
- • Confirm the Secret key is pasted into the Secret Key field (not publishable).
- • Confirm the Endpoint URL matches exactly what Enrollait shows.
- • Confirm the Signing secret in Enrollait matches the destination’s secret.
- • In Stripe, check Developers → Events / Logs to see delivery attempts.